Dev License: This installation of WHMCS is running under a Development License and is not authorized to be used for production use. Please report any cases of abuse to abuse@whmcs.com

How to Enable Ping on Windows Server 2012 R2 Firewall


This method is also applicable for the Windows 2012 server.


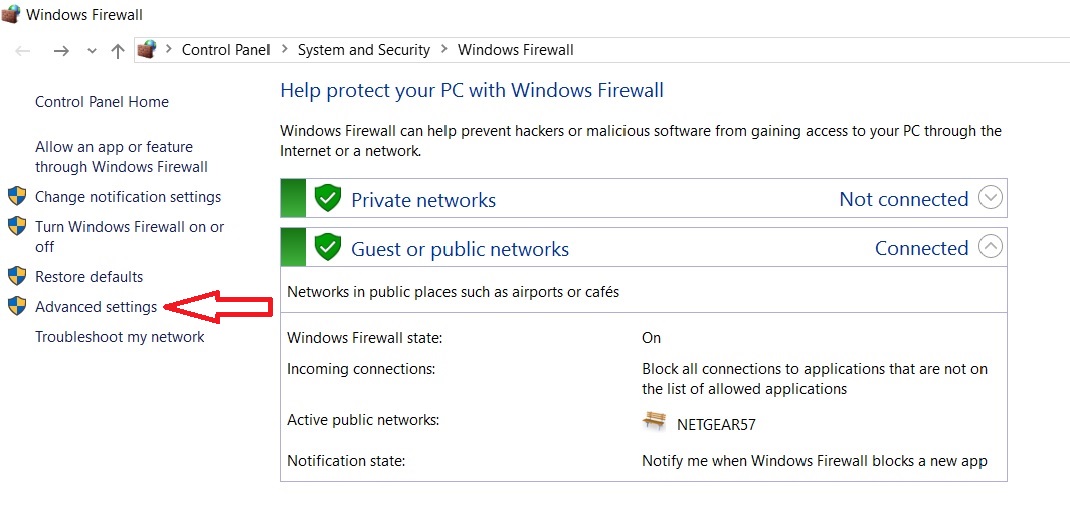
1) Go to the control panel of the server from Windows charm bar or search for ‘control’. Open ‘Windows Firewall’.


2) Click on ‘Advanced Settings’.


3) You need to create a firewall rule that permits ICMP echo packets that are used in the ping command.

This rule is already there in Windows 2012 server and only requires enabling.


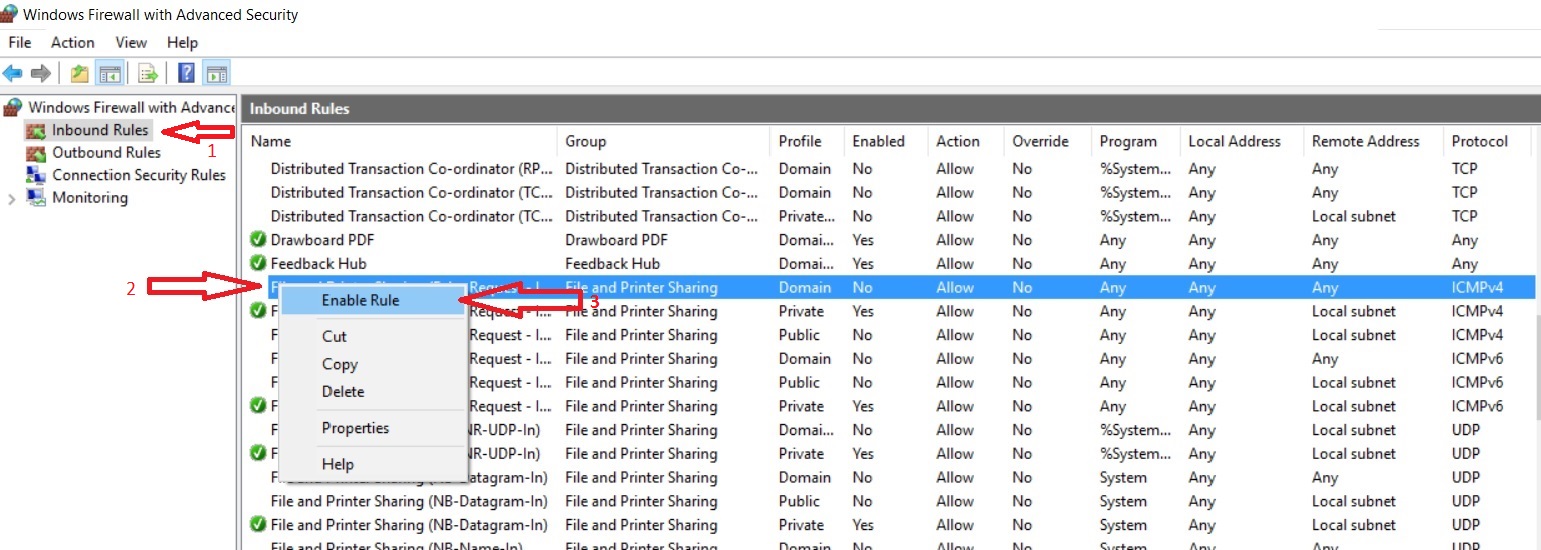
To enable the inbound rule to permit ICMP packets, select ‘Inbound Rules’. right click on ‘File and Printer Sharing (Echo Request –ICMPv4-In’), and select Enable Rule.


This will allow incoming ping requests in a Windows 2012 R2 server and respond to them without completely disabling firewall service.

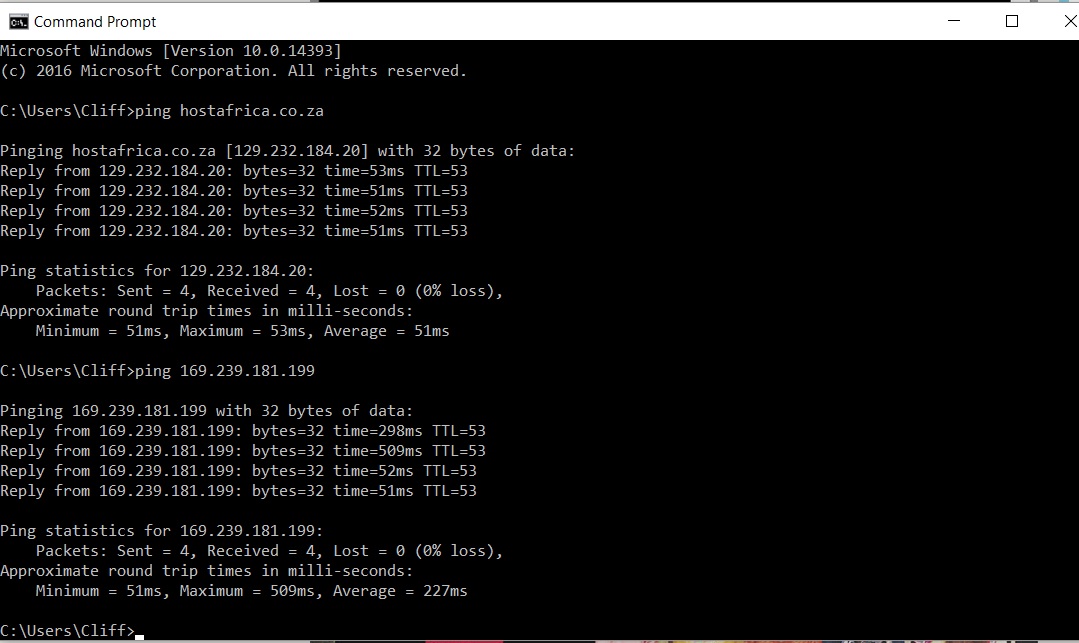
The screen below shows how the Windows 2012 R2 server started responding to the ping request once the above rule was enabled.


  • 24 Users Found This Useful
Was this answer helpful?

Related Articles

Additional IP Address in Windows

  To add the new IP address to the Windows 2012 Server, you will need to connect to the VS...

Additional Volume in Windows

  Log in as Administrator on your Windows Server VPS and open the Server Manager. In...

Install memcache Server Centos 7

  Memcached is a distributed, high-performance, in-memory caching system that is...

How to Ping an IP Address

  The Ping command allows you to test the connection speed between you and another network node,...

How to Enable Rescue Mode

  Users can enable Rescue Mode in any VPS by switching on Rescue Mode option available in...

Powered by WHMCompleteSolution